Programming buttons
esi help videos Programming buttons
Programming buttons
Using your phone
Yes, programming buttons is this simple
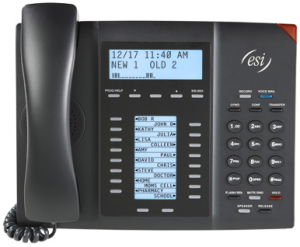
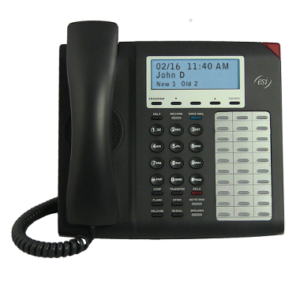
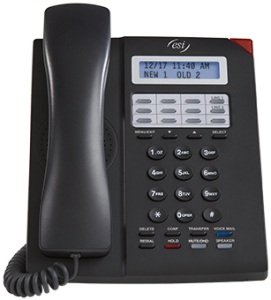
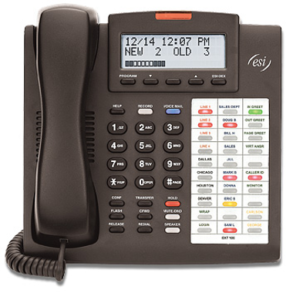
On any of the ESI phone varieties (including the Expansion Consoles), you can perform direct programming buttons by holding down a programmable feature key for at least two seconds, enter an extension number, line number or option code (similar to how you might program a car radio button). This isn’t applicable to the fixed-feature keys which, as their name implies, are already programmed.
Programming button with Esi-Dex
When you don’t know the extension number of a user that you would like to program a DSS button for, press the esi-dex button when in button programming. Choose Station Dex then use the scroll buttons to find the name of the extension you are looking for. Press the programmable key once again to enter it.
Note: A DSS button is a Direct Station Selection button. It provides real time status for the station it represents and provides on touch dialing and transferring.
The station LEDs indicate:
- Solid red = In use
- Solid amber = Do-not-disturb (DND) mode
- Solid green = Connected to you
- Blinking red = Ringing from another call
- Blinking green = Ringing from your call
- “Winking” amber = Off-premises
Option Codes for programming buttons
Note: In the codes, DDD = ACD department number and XXX = extension number.
560 Manual day/night mode
561 Service observing
563DDD ACD agent log on/off
562 ACD agent wrap
563DDD ACD Administrator
564 Headset key
565 Call forward key
565XXX Forward to a destination
566 Redial
567 Call forward/no-answer key
568 Message monitor key
569 Background announce key
570 Conference
571 Personal Greeting 1
572 Personal Greeting 2
573 Personal Greeting 3
574 Caller ID key
575 and 576 Virtual answer keys
577 QuickPage
578 Mute/DND F
579 Voice mail
580 Override ring
579 Voice mail
580 Override ring k
582 Record
583 Quick Switch
584 Account codes
585 Local CO key
587 Loop key
599 Overhead page
More information on option codes for programming buttons
Manual day/night mode (Code 560)
You can use a programmable feature key to manually change the system’s main auto-attendant greeting, incoming call destinations, and CO line group access.1 Each time the key is pressed, the display switches among: DAY, NGT, DAY2, NGT2, HDAY (holiday) or AUTO.2
Tip: To keep the system from being taken out of this mode, place it in auto and then delete the
programmable feature key’s programming.
Notes: The System Administrator can also change the mode and/or re-record the holiday greeting remotely to
handle unexpected closings, such as for inclement weather.
If a second organization or business (“tenant,” in telephony terms) is sharing the system, switching
between day and night mode also changes that tenant’s day/night mode.
Service observing (Code 561)
Your administrator may assign service observing capability to those users who need to monitor others’ calls silently (e.g., in order to aid in quality assurance of call activity). To begin service observing, press the assigned programmable feature key, followed by an extension number or station key. To discontinue observing, press the station key again or hang up. As you observe another station’s incoming call, your display shows to whom that station is connected and how long the call has lasted.
Note: The Administrator must authorize service observing for your station, and the Installer must program the
list of allowed extensions.
Headset key (Code 564)
It’s unnecessary to program this key on an ESI Cordless Handset; one simply plugs in or unplugs a headset as desired. This key provides for easy connecting to/disconnecting from calls when operating in headset mode. Press the key to receive dial tone or to answer a ringing call. Press the key again or press RELEASE to disconnect from the call.
Notes: Not available on legacy 12-Key Feature Phone.
It’s unnecessary to program this key on an ESI Cordless Handset; one simply plugs in or unplugs a
headset as desired.
Call-forward key (Code 565 or 565XXX)
If you frequently call-forward your phone, you can program a programmable feature key as a call forwarding key to automatically turn forwarding on and off. If you always forward to the same extension, you can program a key with both 5 6 5 and the extension number.
Note: Your ESI phone may have a dedicated call-forward key (CFWD).
Redial (Code 566)
This redials the outbound number (i.e., not internal extension) most recently dialed from your station.
Note: Legacy 12-Key Feature Phone only.
Call-forward/no-answer key (Code 567)
Enables or disables the call-forwarding/no-answer feature. When this feature is enabled and someone calls your station but receives no answer, the call will go to the destination you’ve programmed The difference between this feature (Code 567) and traditional call forwarding (Code 565) is that, with this feature, your phone actually rings first before going to the selected destination.
Note: Not available on an ESI Cordless handset.
Message monitor key (Code 568)
Easily toggle the message monitor mode on or off with this key. (Otherwise, you can perform the toggle by pressing PROG/HELP 3 6 and following the prompts.)
Background announce key (Code 569)
During call waiting, you can also make a brief, private background announcement to the station’s earpiece (if the station user has enabled this feature). Hold down the key until you hear a beep, then begin talking; release the key when finished.
Personal greeting keys (Codes 571–573)
These keys will provide for easy activation of one or more of your personal greetings. The key’s LED will be green for the associated personal greeting that is active. These keys can be used in place of or in conjunction with manual activation of the greetings in programming mode.
Caller ID key (Code 574)
Press this programmable feature key to see the stored Caller ID records for your extension’s 25 most recently received calls. Use the scroll keys (up/down ) to view Caller ID information from different calls. (The system stores Caller ID records for only extensions which have a Caller ID key assigned; so, when you first assign the key, you’ll have no previous records through which to scroll.)
Notes: Not available on an ESI Cordless Handset or legacy 12-Key Feature Phone.
This works only if you are receiving Caller ID service from your provider. Consult your Administrator, if needed
Note: The Caller ID key will light only when there’s a missed call. Although voice mail messages’ Caller ID information also is stored by the system, waiting voice mail lights only the VOICE MAIL key. The phone display will also indicate each call’s classification as shown in this chart; also, if this is the first time you’re seeing this particular call’s record, appears to the left of this indication.
Answered by the station ANS
Missed call (abandoned call) MISS
Went to your voice mailbox VM
Answered by “other” means (call-forwarding, use of someone else’s PICK UP key, etc.) RE
While a record is on the display, you may do the following
- To dial the caller displayed, press REDIAL.
- To view the telephone number (rather than the name), press 2.
- To delete a record, press 7 while the record is on the display.
- To store the record in your Personal Dex, press ESI-DEX.
To finish, press the Caller ID key again (or press RELEASE).
Virtual Answer Keys (Codes 575, 576)
You can program a Virtual Answer Key to play a greeting to a caller when your extension is busy and route the caller to a desired destination by pressing this key. Program a programmable function key with either 5 7 5 or 5 7 6. Prompts will instruct you in how to record the greeting and program the caller’s destination. The destination can be either the default call waiting or another station; the system takes the caller there after playing the recorded greeting. With call waiting, the system places the caller on hold as call waiting (“camping on”) for your station; if the caller can’t wait, he/she may (a.) press 1 to reach your voice mail, (b.) enter another extension or (c.) press 0 to reach the Operator. With another station selected, the call is forwarded to the station.
Notes: This works only if call waiting is enabled for your station. Consult your System Administrator if needed. Not available on ESI Cordless Handsets
To record the greeting from an idle phone:
1. Press the chosen programmable function key; then press RECORD.
2. Follow the prompts to record the greeting and program the destination.
Sample greetings for Virtual Answer Keys:
“Hello. This is Harvey. I’m currently on another line, but I’d really like to speak to you. Please hold and I’ll
be with you shortly. However, if you don’t wish to wait on hold, press 1 to leave me a voice message. You
may also either dial another extension or press 0 to reach the Operator.”
“Hello. This is Bill. I’m currently on another line, but I have been notified of your call. I am sending your call
to our Sales Department administrator for more immediate assistance. Please remain on the line as your
call is being transferred. Thank you.”
Note: If a caller presses 1 to go to your voice mail, the call will go into that extension’s mailbox, regardless of whatever call-forwarding settings your ESI Installer has made.
Here’s an example: The Installer has set the call-forwarding for extension 101 to go to mailbox 102. The user at extension 101 uses a Virtual Answer Key to answer a call, and the caller presses 1 when prompted to go to voice mail. That caller will go to mailbox 101 — not mailbox 102.
QuickPage (Code 577)
Normally used by an operator, this key lets you quickly put on hold, and page, a station user. While on an outside-line call, you can press a QuickPage key, then enter a station number (or press a programmable feature key programmed for an extension) and the system will automatically page the person1, then forward the call to the person’s voice mailbox if he/she doesn’t answer.
Mute/DND key (Code 578)
This multi-mode key’s function varies, depending upon whether the phone is on a call or idle:
- If the phone is on a call (off-hook) — Mutes the microphone so that the person on the other end of the line can’t hear you.
- If phone is idle (on-hook) — Puts the phone into do-not-disturb (DND) mode, sending callers directly to your voice mailbox.
Note: When programmed on an ESI Cordless Handset, this key performs only the DND function; to mute or “un-mute” an ESI Cordless Handset, use the keys on its side.
Voice mail (Code 579)
Allows a legacy 12-Key Feature Phone (which lacks a dedicated VOICE MAIL key) to have voice mail access.
Warning: To use voice mail from a legacy 12-Key Feature Phone, you must assign this code to a programmable feature key. Failing to do so will disable the mailbox. (When you try to access a disabled mailbox, the system will notify you that it’s disabled.) You still can retrieve previously left messages and access user programming, but the mailbox won’t be able to receive new voice messages. Therefore, to enable the mailbox, assign key code 5 7 9 to a programmable feature key.
Override ring (Code 580)
The override ring feature lets you place a call — station-to-station, outside line or Esi-Link — or leave a voice message when another call is ringing. For full details on using this feature, see “Override ring,”.
Record (Code 582)
Press this key to record any phone conversation — or, when the Cordless Handset is idle, to record a
personal memo. For more details on using your ESI system’s call recording features, refer to “Live recording,”
Note: Available for only ESI Cordless Handsets and the legacy 12-Key Feature Phone.
Quick Switch™ (Code 583)
Important: For the Quick Switch feature to work, your Installer or System Administrator must have programmed a relationship between your desktop extension and Cordless Handset. Program the key on the ESI desktop phone. Press this key to transfer an active call between an ESI desktop phone and an ESI Cordless Handset (either direction — to or from the ESI desktop phone).
Note: Not available on an ESI Cordless Handset or legacy 12-Key Feature Phone.
Quick Switch ring options
When both the desktop extension and Cordless Handset are idle, press the Quick Switch key. Follow the visual and audible prompts and use the scroll keys to change the programmable options concerning what happens when a caller dials (or is transferred to) either your desktop phone or Cordless Handset:
• RING DESKTOP — Only the desktop phone will ring.
• RING CORDLESS — Only the Cordless Handset will ring.
In either of the two cases above, re-routing (including to a voice mailbox) will follow the desktop phone.
The other choice is:
• NO RING OPT — If a caller dials (or is transferred to) the desktop phone, only that phone rings. If the caller dials (or is transferred to) the Cordless Handset, only the Cordless Handset rings. Re-routing follows whichever phone rang.
Performing Quick Switch
While you’re on a call, or while a call is ringing to the desktop, the Quick Switch key on your desktop phone glows solid green; this indicates that you can perform a Quick Switch. To transfer the call to your Cordless Handset:
1. Press the Quick Switch Key. This “blind-transfers” the call to the ESI Cordless Handset, causing it to ring, while simultaneously disconnecting the desktop phone.
2. On the Cordless Handset, answer the ringing call by pressing TALK. Once again, the Quick Switch key on the desktop phone glows green to indicate the ability to perform a Quick Switch.
3. When and if desired, press the Quick Switch key on the deskop phone. This “blind-transfers” the call back to the desktop phone, causing it to ring, while simultaneously disconnecting the Cordless Handset. Of course, you can do this in exactly the reverse order — i.e., if you start out with a call on your Cordless Handset, you can Quick Switch it to your desktop phone and, if desired, back again.
Notes: If you transfer a call unintentionally, pressing FLASH won’t retrieve the call. However, you can perform another Quick Switch or use the PICK UP key to pick the call from the ringing extension (i.e., press * followed by the extension number).
If (a.) you’re on a call and (b.) another call comes in and (c.) you Quick Switch the active call to the other phone (desktop or Cordless) . . . the call-waiting caller will continue to ring and follow regular system routing (such as to your voice mailbox) if not answered in some manner.
Account codes (Code 584)
The account codes key lets you assign an account code to a specific call. The system stores this in a record which your company can use for tracking purposes. This can be especially helpful in environments such as legal offices, consultancies, advertising agencies and others where it is critical to confirm billable hours for your clients.
Note: For exact codes to be used, consult your System Administrator.
During a call, press the key, enter a designated account code, and then press #. The code must be numerical only — i.e., between 0 and 9, only — and no more than 10 digits long. For greater convenience, you can assign frequently used account codes to programmable feature keys. In each case, just program 5 8 4 followed by the desired account code.
General information regarding use of account codes for programming buttons
• Account codes are applicable to only outside calls (not internal “intercom” calls).
• You can enter more than one account code during the same conversation — particularly useful in a conference call that involves multiple clients or customers.
• Neither an incoming caller or a person being called will hear the tones as you enter account codes.
• If you enter an incorrect account code, just press the account code key again and enter the desired number.
• Pressing the account code key won’t affect the recording of a call.
• It’s not necessary to enter an account code to place an outbound call.
• The phone system won’t prevent entry of an invalid account code.
Local CO (Code 585)
The local CO key provides dial tone for an analog line connected to the Cordless Handset’s base station.
Note: Available for only the ESI Remote IP Cordless Handset.
Important: Use this key if you have to make a 9 1 1 emergency call! Otherwise, it will appear to the dispatcher’s computer as if you’re at the location of the ESI Communications Server and not where you really are.
Loop key (Code 587)
A loop key allows for the appearance of any CO line or Esi-Link call that may be ringing a station, without the need for a programmable feature key to be programmed as a CO line key. Up to six loop keys may be programmed per station.
Using a loop key
• Incoming outbound calls will appear on the first available loop key (if one or more loop keys are programmed on the phone).
• Calls may be placed on exclusive hold simply by pressing the active loop key.
• If multiple calls are on loop keys, a user may toggle between the calls by pressing a desired loop key. (The call that was originally active on a loop key will be placed on exclusive hold.)
• Calls placed on exclusive hold on a loop key can be retrieved from exclusive hold by only the station that placed the call on exclusive hold, and can be retrieved simply by pressing the flashing loop key.
• If the HOLD key is used, the caller will be placed on system-wide (not exclusive) hold and the loop key will return to an idle state.
Loop key LED indications
If the loop key LED color is . . . The loop key call status is . . .
Slowly blinking green … Held by your station
Blinking green …Ringing at your station
Solid green …Connected to your station
Slowly blinking red …On Virtual Answer hold

